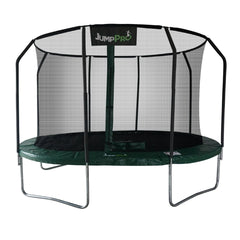
How long does it take to build a trampoline?
Most trampoline builds take two adults a few hours. Here’s what to do first, how to avoid common wobbles, and when to fit the net.
 The Jump Hub
powered by

 WhatsApp
 Facebook
 LinkedIn
On this page
The short answer
With two adults, most trampoline builds take a few hours rather than a whole day, so plan the afternoon.
- People: Two adults is the realistic minimum for the frame and enclosure.
- Time: Allow a few hours, with extra time if you need to check parts or pause.
- Fiddliest stage: Fitting the springs or rods evenly can take patience.
- Best approach: Follow your model’s manual in order, and don’t rush the checks.
Your trampoline’s own manual always comes first.
A pile of boxes, an impatient child, and the worry that one wrong move will mean starting again: build day can feel like a lot. The good news is that taking it step by step makes the job much more manageable.
With the parts checked and two adults sharing the work, you can aim for a steady, wobble-free trampoline by teatime. The exact build varies by model, so keep the instructions close and let them guide each stage.
Before you start: unpack and check every part
Choose a flat, clear spot for assembly, then unpack the boxes and check everything against the manual’s parts list. Do this before connecting any frame pieces. Finding a missing bolt or pole now is much better than discovering it halfway through the build.
Lay similar parts together, keep small fixings somewhere they won’t disappear in the grass, and identify the tools listed in the manual. If the boxes or parts don’t match the list, pause and contact the retailer before carrying on.
It also helps to decide where the finished trampoline will sit. Allow about 1m all the way round, away from fences, sheds, trees, washing lines, and other obstacles. You can use the garden size checker to plan the space.
Step 1: build the frame and legs
Build the frame on its own, following the sequence in your manual. It may take a little adjusting to line up the sections and connect them securely. Avoid forcing pieces that don’t seem to fit. Check the instructions and make sure you have the right parts in the right positions.
Once the frame is together, add the legs as directed. Check that every leg is fully seated in its socket. A leg that looks connected but is only partway in is a classic cause of a wobble later.
Make sure the frame is on level ground before moving on. If the ground is uneven, the trampoline can rock, even when its parts are fitted correctly.
Step 2: fit the mat and springs or rods
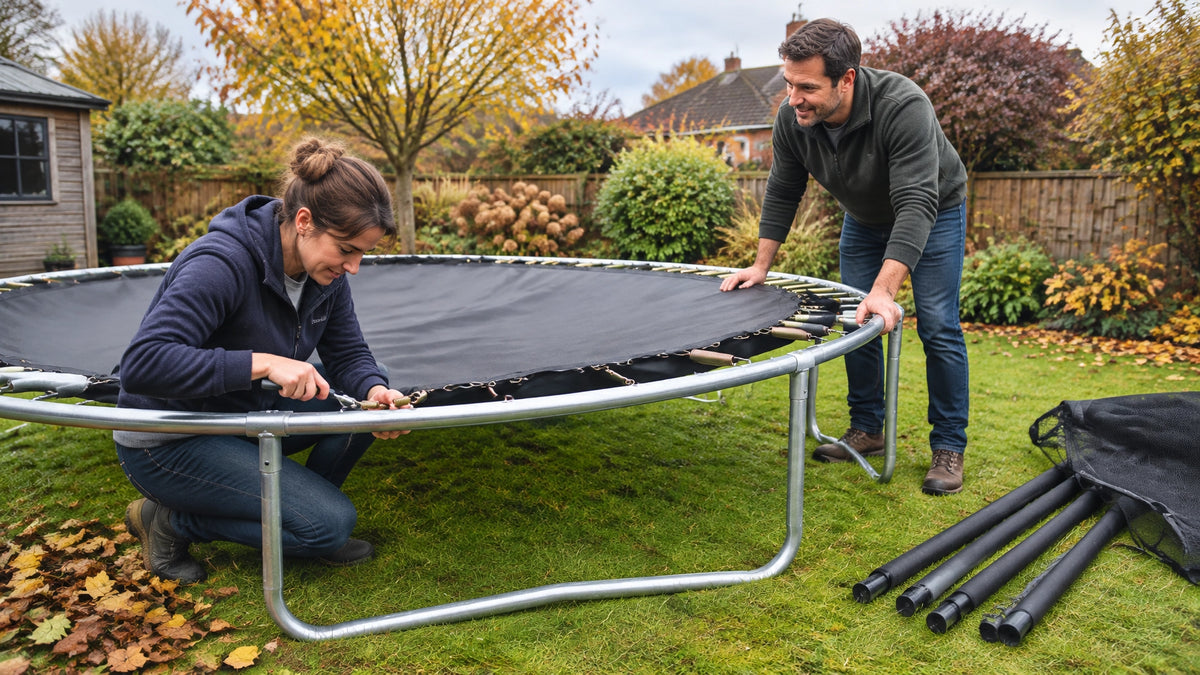
This is often the slowest and most fiddly stage. The mat may feel tight as you start, because it needs to stretch as the springs or rods are fitted. That’s expected, but follow your manual rather than trying to force anything.
For spring models, use the spring-pulling tool if one is supplied. Fit springs in a star or alternating pattern, working on opposite sides rather than moving around the frame in one direction. This helps keep the tension even as you go.
Uneven tension can leave the mat sitting out of shape, affect the bounce, and put extra strain on the frame. If the trampoline uses rods instead of springs, follow its model-specific instructions. The fitting method can differ.

Keep fingers clear of spring hooks and frame slots. Springs become harder to fit as the mat stretches. Use the tool as directed, and never use your fingers to pull a spring into place.
Step 3: fit and secure the pads
When the mat and springs or rods are fitted, place the pads over the springs and frame. Tie or strap them down properly, as shown in the manual, so they stay in position.
Before moving on, check that the pads cover the intended area and that their fastenings are secure. Don’t leave loose ties or straps where they could catch.
Step 4: fit the enclosure net last
Fit the enclosure net once the frame is square and the mat is tensioned, with the pads in place. The net and its poles can be awkward to handle alone, so it’s another stage where two adults make a real difference.
Follow the manual to position the poles and attach the net. Check its tension carefully. A net that is too loose or too tight can create snags or gaps near the poles.
Before anyone uses the trampoline, check that the net is attached correctly and that its entrance closes as intended. A finished-looking enclosure isn’t enough if parts are still loose or misaligned.

Keep the instructions beside you as you work. Some details vary between models, so another trampoline’s build video or a general guide may not match yours.
Would you rather not build it yourself?
If your weekend has better plans, you can book a Taskrabbit Tasker to build it for you. Taskers assemble trampolines up to 14ft, including inground models, though the pit for an inground trampoline needs digging first.
What causes a trampoline to wobble later?
If the trampoline doesn’t feel stable, stop and check the build rather than trying to correct it by bouncing. Common causes include:
- Springs fitted unevenly: Check that they follow the pattern in the manual and sit properly in their slots.
- Legs not fully seated: Recheck each leg where it joins the frame.
- Net tension incorrect: Look for loose areas, snags, or gaps at the poles.
- Uneven ground: Confirm the frame sits level on a flat surface.
A careful final check is worth the extra few minutes. Make sure all frame connections are secure, the legs are fully seated, springs or rods are correctly fitted, and pads and net are firmly in place.
Keep the manual and note the model number
Put the manual somewhere safe, and note the trampoline’s brand, model, and size now. These details are easy to lose once the packaging has gone, but they can make future help or spare parts requests faster and more accurate.
If you need a spare part for a trampolines.co.uk order, send your request in writing to hello@trampolines.co.uk. Include the model details, your order number if available, and a photo of the part if you can. You can also read how to order trampoline spare parts.
Stuck because a part is missing, or unsure which piece goes where? Pause the build and check the parts list and manual again. For trampolines.co.uk orders, email hello@trampolines.co.uk with your model details and a clear photo of the part or problem.


Trampoline build questions
How long does it take to build a trampoline?
Most take two adults a few hours, so plan an afternoon. Bigger models take longer: our 23ft JumpPRO® Xtra takes about 4 to 5 hours, with three or four adults for some steps.
Can one person build a trampoline?
One person may be able to complete small parts of the assembly, but two adults is the realistic minimum for building the frame and fitting the net. Having someone steady the frame or help guide the net makes these stages easier to manage.
What tools do I need?
The tools vary by model, so check the manual’s tool list before you begin. A spring-pulling tool is useful for spring models if supplied, and some builds may call for a rubber mallet or a Phillips screwdriver.
Why are my springs hard to fit?
Spring tension increases as you fit more springs, so they can feel difficult at first. Use the supplied spring tool and follow the alternating pattern in your manual. Never pull springs into place with your fingers.
When should I fit the net?
Fit the enclosure net last, after the mat, springs or rods, and pads are fitted and checked. Follow your trampoline’s instructions to get the poles and net tension right, without snags or gaps.
What if parts are missing?
Stop and contact the retailer’s customer team straight away, with your trampoline’s model number and details of the missing part. For trampolines.co.uk orders, email hello@trampolines.co.uk in writing.
Take your time, check each stage, and keep the manual handy. Once the build is complete, confirm there’s about 1m clear all the way round before it’s ready to use.
Know another trampoline family? Send them this guide.
The Jump Hub is powered by
JumpPRO® is our own range of garden trampolines, designed by the trampolines.co.uk team after helping UK families choose since 2004. Every one is tested to EN 71-14, the European standard for garden trampolines, and they've been picked by The Independent's testers three years running. The same team writes every Jump Hub guide, so if this one didn't answer your question, give us a call.
Keep reading
More ways to keep it bouncing
 Akrobat XcityX: the last trampoline you'll ever need to buy?Akrobat's biggest trampoline is built to be the last one you buy. Here's what you get, who it suits, whether it fits your garden, and if it's worth it.Read the guide
 Do trampolines need anchors in the UK?Not every trampoline needs anchors, but exposed gardens and stormy weather make a tie-down kit worth considering. Here’s how to decide.Read the guide
 Will a trampoline fit in your garden? The measuring guideA tape measure, a marked-out footprint, and a few minutes can tell you whether a trampoline will fit safely.Read the guide

Keep them bouncing all year round
Covers, tie-down kits, and trampoline socks, so it's ready for every dry, sunny day of the year.
90-day Bounce Back PromiseSame-day dispatch by 3pm
“Really great product my children love it.”