5 minutes, 5 checks: the simple winter trampoline maintenance guide
Wind, rain, frost, and snow are tough on a garden trampoline. Five quick checks of the frame, mat, springs, net, and anchoring help you spot small problems before they become big ones.
 The Jump Hub
powered by

 WhatsApp
 Facebook
 LinkedIn
On this page
The short answer
Spend five minutes before the autumn storms checking five things, then check again after bad weather and in spring:
- Frame: tight fixings, and no cracks, bends, or rust weeping from the joints
- Mat: no tears, fraying, or brittle fabric
- Springs: none snapped, stretched, or badly rusted
- Net: no holes, a secure entrance, and firm poles
- Anchoring: tight straps, and stakes in firm ground
If anything is damaged, stop using the trampoline until the part is replaced.
Winter in the UK can be tough on outdoor equipment like trampolines. Wind, rain, frost, and snow all put extra strain on play equipment left out in the garden, particularly when it is left outside year-round, as many are.
The good news is that a quick visual inspection can help you spot small problems before they become bigger ones. Set aside five minutes before the autumn storms arrive and work through these five checks. You will not need any specialist tools, and you can usually do everything where the trampoline stands.
Always follow your trampoline manufacturer's instructions where they differ from this general guidance.
What you need
- Protective gloves
- A spanner
- A clean cloth
- Warm soapy water
- A soft brush or broom for leaves and light snow
Avoid harsh chemicals, abrasive cleaners, and jet washers, which can damage the mat, padding, net, or stitching.
Your five-minute winter checklist
| Check | Look for | Warning signs |
|---|---|---|
| 1. Frame | Tight fixings, straight tubes, stable legs, and a level trampoline | Loose bolts, movement, rust weeping from joints, cracks, or bent legs |
| 2. Mat | Clean, dry fabric with secure stitching and even tension | Tears, fraying, brittleness, significant fading, sagging, or damaged attachment points |
| 3. Springs | Springs with even tension, intact hooks, and little or no corrosion | Snapped, stretched, or rusty springs, gaps, or deformed hooks |
| 4. Net | Secure poles, intact mesh, a working zip, and a firm net-to-mat connection | Holes, snags, loose fastenings, damaged pole caps, or a net that has lost tension |
| 5. Anchoring | Tight straps, secure stakes, and firm ground around each anchor | Loose stakes, slack straps, soft soil, or a trampoline that has shifted |

1. Check the frame
Start with the metal frame, legs, and joints. Run your hand around the whole trampoline, paying particular attention to the points where the legs meet the frame and where sections of tubing join together.
What to look for
- Loose bolts, nuts, or fixings
- Bent or twisted frame tubes
- Cracks, sharp edges, or damaged welds
- Rust, especially rust that appears to be “weeping” from a joint
- Leg junctions that look bent or no longer sit correctly
- A frame that rocks, moves, or is no longer level
Gently test the frame by hand. It should feel solid, stable, and properly connected. Check that every leg is sitting firmly on the ground and that the trampoline has not shifted after wet weather.
What should it look like?
The frame should be straight, stable, and level, with all fixings tight and no sharp edges or significant corrosion.
If something is wrong
Tighten loose fixings with a suitable spanner, following the assembly instructions for your trampoline. Do not force a bolt that is cross-threaded or replace fixings with a random alternative.
If a frame section is bent, cracked, unstable, or badly corroded, stop using the trampoline until the part has been assessed and replaced with a compatible, manufacturer-approved part.
If a frame section needs replacing, you'll find the full process on our How to Order Spare Parts page. Send us your model and a photo of the damaged part, and our team will match it for you.

2. Check the mat
The jumping mat is exposed to sunlight, rain, dirt, and temperature changes throughout the year. Look closely at the fabric and, especially, the areas where the mat connects to the springs.
What to look for
- Tears, holes, or cuts
- Frayed stitching around the edge
- Damaged D-rings or attachment points
- Heavy UV fading, or fabric that feels brittle
- Unusual sagging or uneven tension
- Leaves, twigs, standing water, or other debris
Lift or move the edge padding carefully so you can see the stitching and attachment points. Clean the mat with warm soapy water and a soft cloth, then allow it to dry fully.
What should it look like?
The mat should be clean, dry, and evenly tensioned. The stitching should be intact, with no tears, brittle areas, or damaged attachment points.
If something is wrong
Do not patch a damaged jumping mat with tape or household fabric. A tear can spread under repeated use, so replace the mat if it is ripped, badly worn, or no longer holding its shape. A replacement mat needs to be the right size and spring tension for your frame, so it's worth getting the match checked. Our spare parts guide explains how to find yours.
A small amount of fading is normal, but fabric that feels dry, brittle, or weak is a warning sign. Keep the mat clear of heavy snow too, as it puts a lot of weight on the mat and springs. Remove it carefully with a soft broom before it builds up, and never use a shovel or sharp tool.
A trampoline cover made for your size keeps leaves, rain, and frost off the mat between bounces.
3. Check the springs
Springs gradually lose tension through normal use. They are repeatedly stretched and compressed, and winter moisture can encourage surface corrosion.
What to look for
Inspect every spring rather than checking only a few. Look for:
- Snapped or missing springs
- Springs that look overstretched compared with the others
- Visible gaps between coils
- Rust or heavy corrosion
- Hooks that are bent, open, or no longer sitting correctly
- Uneven tension around the trampoline
What should it look like?
The springs should be similar in length and shape, with both hooks properly attached. They should be free from serious corrosion and show no visible deformation.
If something is wrong
Replace damaged or missing springs with the correct type for your trampoline. Do not mix unsuitable springs or try to bend a damaged hook back into shape.
If several springs are stretched, it may be general wear rather than one isolated problem. Make a note of it and check your manufacturer's guidance before the trampoline is used again.
Springs are one of the most common replacement parts, and we stock them for most models we've sold over the years. See how to order spare parts to get the right length and tension for your trampoline.

4. Check the net
The enclosure net is an important part of the trampoline's safety system, but it also catches the wind. Autumn storms can pull on the net, its poles, and the points where it connects to the mat or frame.
What to look for
- Holes, snags, or thinning mesh
- Loose or damaged stitching
- A zip or entrance fastening that does not close properly
- Loose clips, ties, or straps
- Pole caps that are missing or split
- Poles that are not seated correctly
- A loose net-to-mat connection
- Netting that has lost its normal tension
Walk around the trampoline and check the net from both inside and outside. Open and close the entrance carefully, and make sure the fastening reaches the end of its track. Missing pole caps are a small fix but worth sorting before winter, as they stop water getting inside the poles.
What should it look like?
The mesh should be intact and firmly attached. Poles should be upright and secure, with caps and sleeves in place. The entrance should close fully.
If something is wrong
Do not use the trampoline if the net has a large tear, an open seam, or a fastening that cannot secure the entrance.
A damaged net should be replaced rather than repaired. Nets are made for each model, so send us your trampoline details and we'll confirm the right one. Our How to Order Spare Parts page walks you through it.
In strong winds, the net can act like a sail. We recommend taking enclosure nets down in high winds, as explained in our trampoline FAQ.
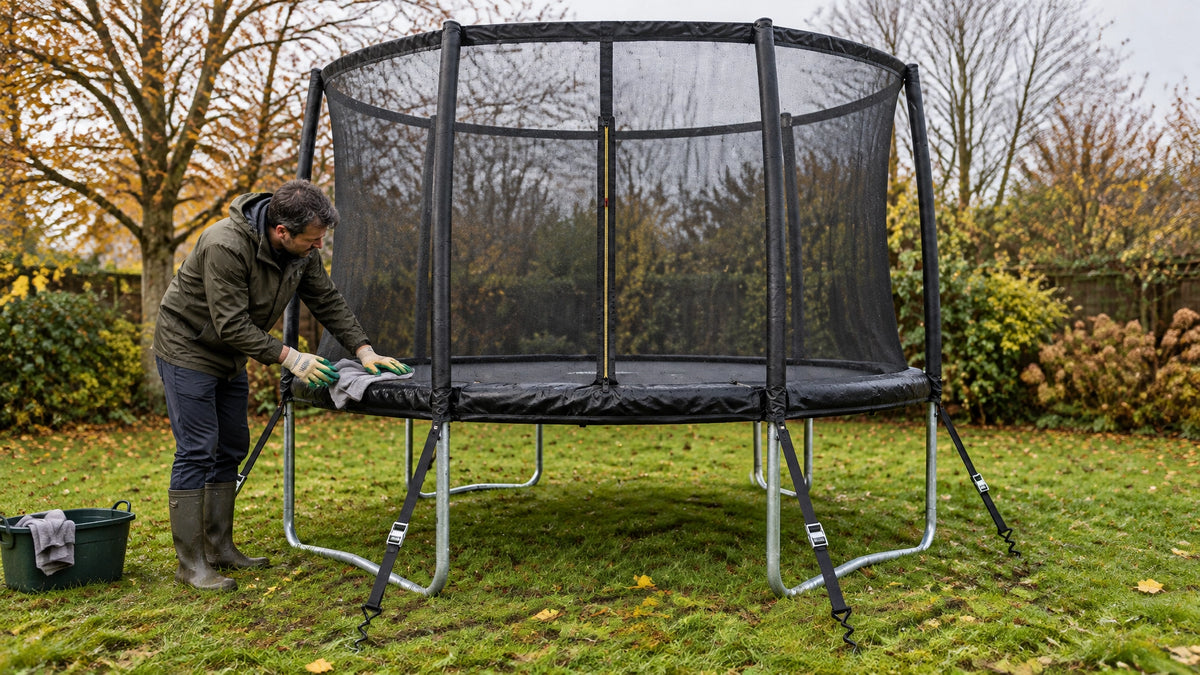
5. Check the anchoring
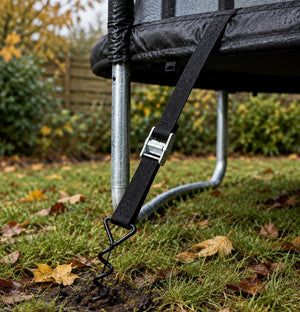
Anchoring helps reduce movement in windy conditions, but it does not make a trampoline storm-proof. Check the complete system: the ground stakes, straps, buckles, and the points where the straps connect to the frame.
What to look for
- Stakes that are still firmly in the ground
- Straps that are tight and not damaged
- Buckles that close securely
- Frame connections that have not slipped
- Soil that is firm enough to hold the anchors
- A trampoline that is still in its original position
Heavy rain can soften garden soil, so some stakes lose their grip. Check the ground around each anchor and retighten or reposition the system if needed, following the manufacturer's instructions.

What should it look like?
The anchors should be secure, the straps should have no fraying or cuts, and the frame should sit level without shifting when gently tested.
If something is wrong
Do not rely on bricks, garden furniture, fences, or improvised ropes in place of proper anchoring. Replace damaged straps or stakes with suitable parts.
If high winds or a storm are forecast, stop using the trampoline and act early. Depending on the model and the manufacturer's instructions, this may mean removing the enclosure net, securing the trampoline more thoroughly, or taking it down. Move loose garden items indoors as well.
90-day Bounce Back Promise
When should you stop using the trampoline?
Do not let anyone use the trampoline when the mat is:
- Wet or slippery
- Covered in frost or ice
- Carrying snow
- Damaged or visibly sagging
Never let snow sit on the mat. Clear light snow with a soft broom, working gently from the centre towards the edge. After heavy snow, inspect the mat, springs, frame, and anchoring before anyone bounces.
You should also stop use during strong or gusty winds, even if the trampoline appears secure. Anchors reduce movement but cannot guarantee that a trampoline will stay in place in extreme weather.
A padded cover helps keep leaves, twigs, and some weather off the mat, and a tidy garden means less debris blowing onto the trampoline. A cover is not a replacement for inspection, anchoring, or following the manufacturer's winter storage advice.
Covers, anchor kits, and other winter accessories can be added to a spare parts order, so you only pay one delivery charge. See How to Order Spare Parts for how that works.
How often should you check it?
A simple seasonal routine works well:
- Before autumn storms: complete all five checks.
- After strong winds or heavy rain: check the frame, net, and anchoring again.
- After snow or frost: clear the mat and wait until everything is dry and safe.
- In spring: repeat the full inspection before the first proper bouncing session.
If your trampoline is in an exposed garden, near the coast, or on particularly soft ground, check it more often.
Frequently asked questions
Do I need to take my trampoline down for winter?
Not always, but taking it down and storing suitable parts indoors gives the best protection from harsh weather. If you leave it up, follow the manufacturer's guidance, use proper anchoring, clear heavy snow promptly, and consider taking down the enclosure net before high winds.
Can I use my trampoline in winter?
Yes, but only when the mat is dry, clear of frost and ice, and the weather is calm. Do not use it in rain, snow, icy conditions, or strong winds. Our trampoline FAQ also advises against use in wet, snowy, or icy weather.
How often should I check my trampoline?
Carry out the five checks before autumn storms, after severe weather, and again in spring. A quick look before use is also sensible, particularly if the trampoline has not been used for a few weeks.
What causes trampoline springs to stretch?
Repeated jumping naturally causes springs to lose tension. Going over the trampoline's user or weight limits, leaving heavy snow on the mat, and corrosion can all speed this up. Bouncing near the edge of the trampoline rather than in the middle can also make springs stretch faster and break.
Is surface rust a problem?
Light surface rust should be watched, particularly on springs and joints. Heavy corrosion, flaking metal, rust around welds, or any rust that has weakened a part is a reason to stop using the trampoline and replace the affected part.
Can I jet wash my trampoline?
It is best not to. High-pressure water can force moisture into stitching, damage the mat or net, and strip protective finishes. Use a cloth or soft brush with warm soapy water instead, then let everything dry completely.
Where can I order trampoline spare parts?
Our How to Order Spare Parts page explains the full process. In short, send us your original order number or trampoline model, any part numbers from your manual, and clear photos of the part you need, and our team will match it and email you a secure payment link.
How do I know which part I need?
Photos are the most reliable way. Send us a clear picture of the part, along with your trampoline model, and we'll confirm the match for you. Simple measurements, such as frame diameter or spring length, also help. If you have your assembly manual, include the part numbers in it too.
Are replacement parts covered by warranty?
If a part has failed because of a manufacturing defect and your trampoline is still within its warranty period, we'll replace it free of charge. Parts that have failed through general wear and tear, been lost, or been damaged by misuse or extreme weather are chargeable.
Should I replace a worn part now or wait until spring?
Ordering over winter usually means your trampoline is ready as soon as the weather improves, and you're not waiting on stock in the busiest weeks of spring. It also avoids leaving a damaged mat, net, or springs out in the worst of the weather.
Ready for spring
Five minutes now makes winter care much easier. Keep a note of anything that needs cleaning, tightening, or replacing, so you can deal with it over the colder months and start spring bouncing with confidence.


Happy bouncing!
Know another trampoline family? Send them this guide.
The Jump Hub is powered by
JumpPRO® is our own range of garden trampolines, designed by the trampolines.co.uk team after helping UK families choose since 2004. Every one is tested to EN 71-14, the European standard for garden trampolines, and they've been picked by The Independent's testers three years running. The same team writes every Jump Hub guide, so if this one didn't answer your question, give us a call.
Keep reading
More ways to keep it bouncing
 Our open letter to parents: let them playWe've backed the plans to restrict social media for under-16s. Here's why, in a few lines, and where to read the whole letter.Read the story
 Two JumpPRO® trampolines win in The Independent's 2026 IndyBest reviewThe Independent's IndyBest testers built and bounced on trampolines in real gardens for their 2026 review, and two from our JumpPRO® range won their categories.Read the story
 Try before you buy: our trampolines at the Ideal Home Show 2026In April, we took our award-winning trampolines to the Ideal Home Show at Olympia London, so children could bounce and parents could check the build for themselves before they bought....Read the story

Keep them bouncing all year round
Covers, tie-down kits, and trampoline socks, so it's ready for every dry, sunny day of the year.
90-day Bounce Back PromiseSame-day dispatch by 3pm
“Really great product my children love it.”